Cult SEO v2.0
Static SEO analysis, recommendations, and more. Crawls websites at lightning speed, grades performance, and generates AI-powered improvements. Use this template to build your own SEO analysis tool.
React Server Components Crawler
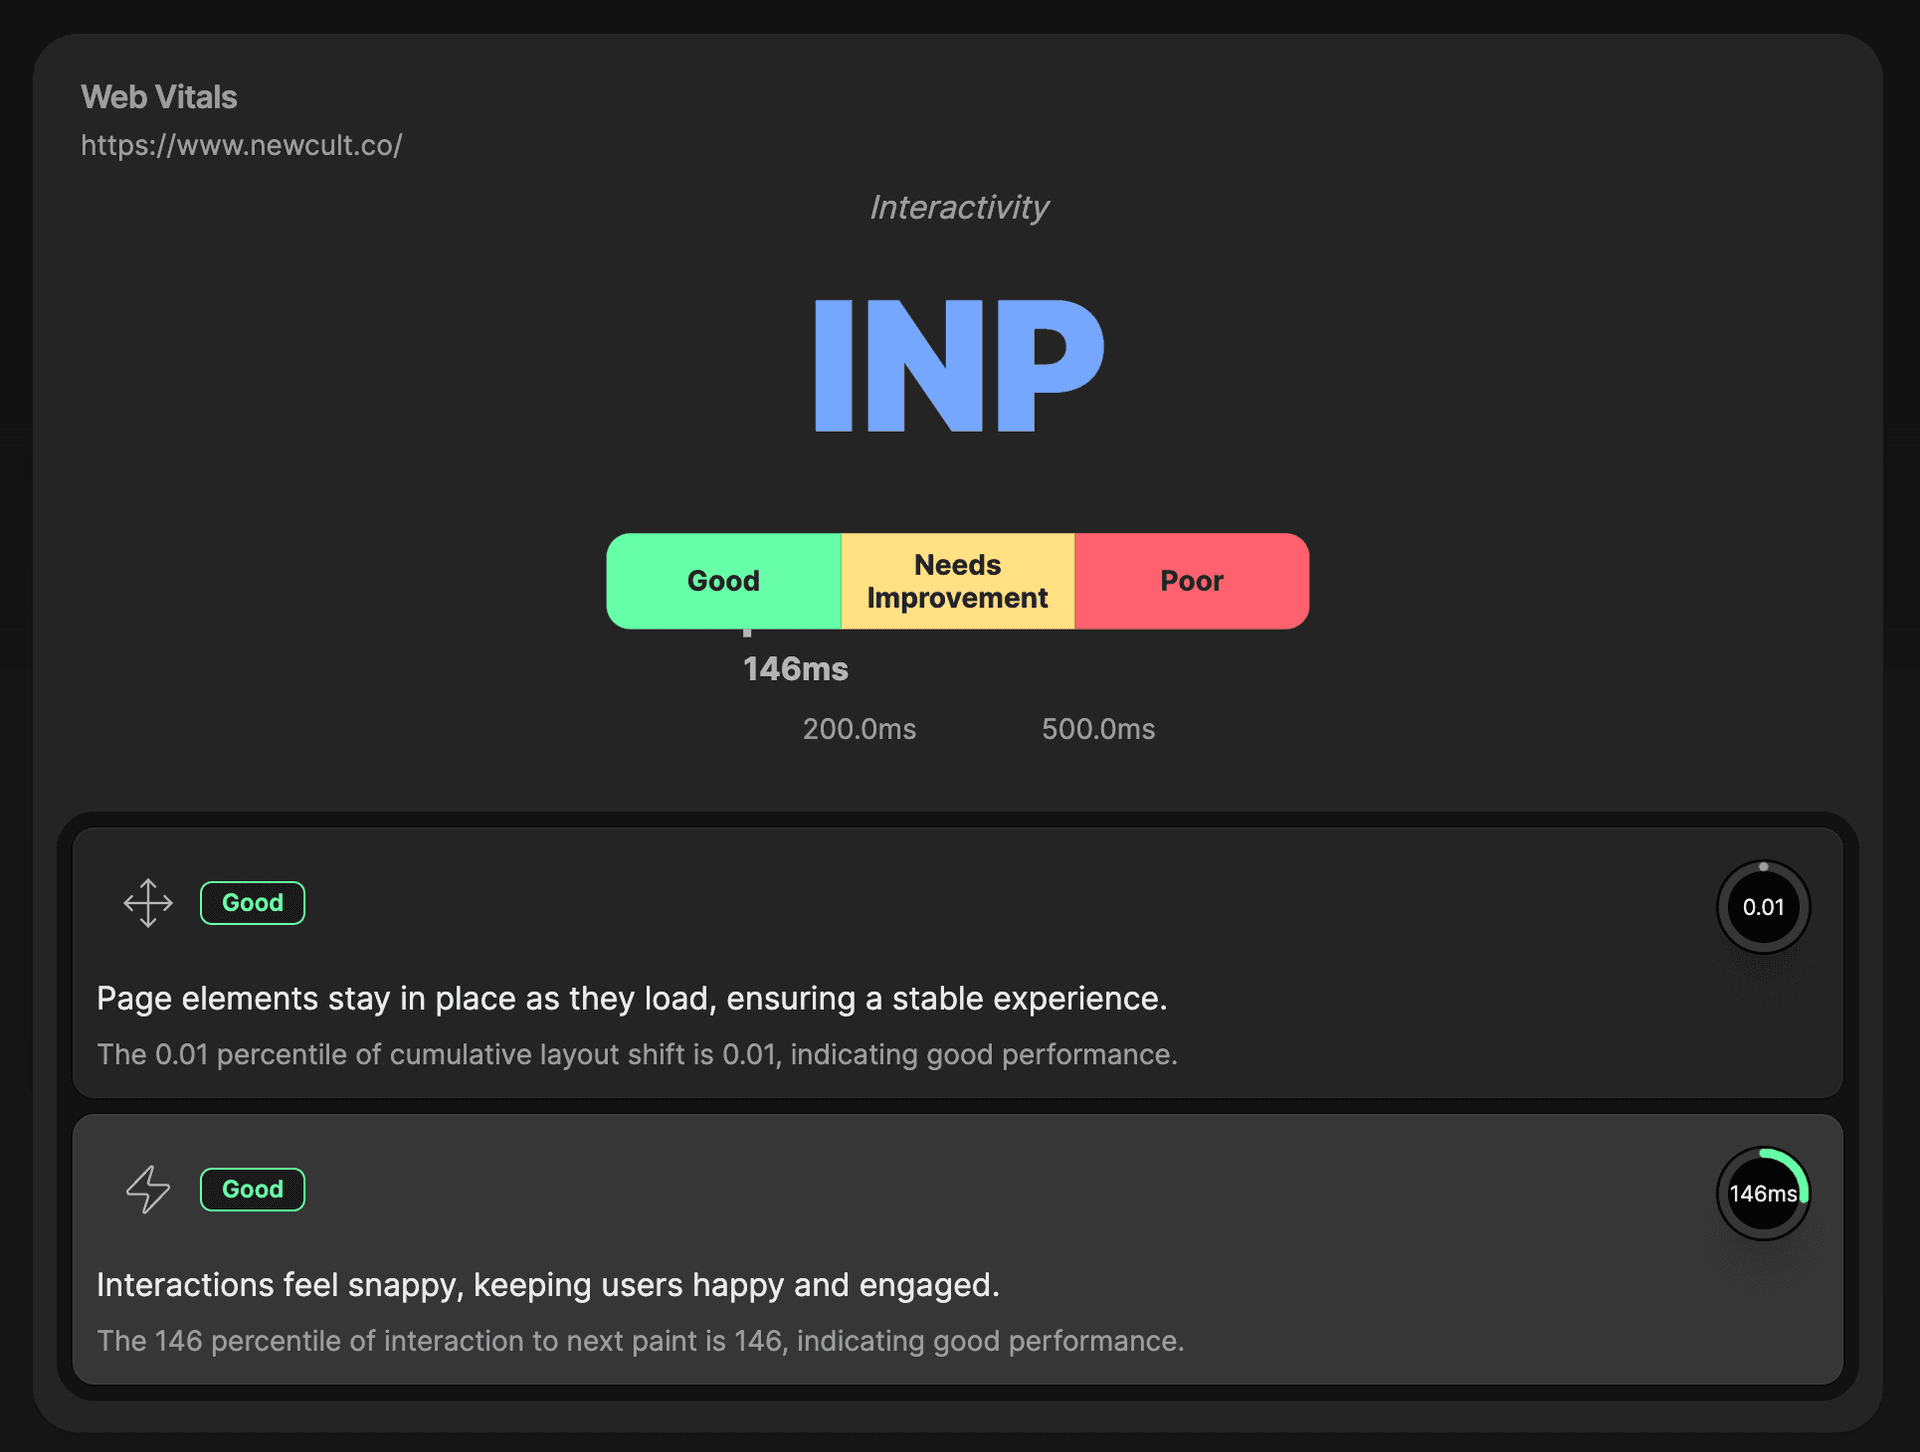
Core Web Vitals Analysis
AI-Powered SEO Recommendations
Next.js
15.5.0Tailwind CSS
4.0Open AI
v5
Key Features
React Server Components Crawler
Implement a high-performance web crawler using React Server Components for efficient server-side rendering and data processing.
Core Web Vitals Analysis
Integrate with Google's Chrome User Experience Report (CrUX) API to fetch and analyze Core Web Vitals metrics for any website.
AI-Powered SEO Recommendations
Leverage Claude AI and Zod for type-safe, structured SEO advice generation based on crawled data and performance metrics.
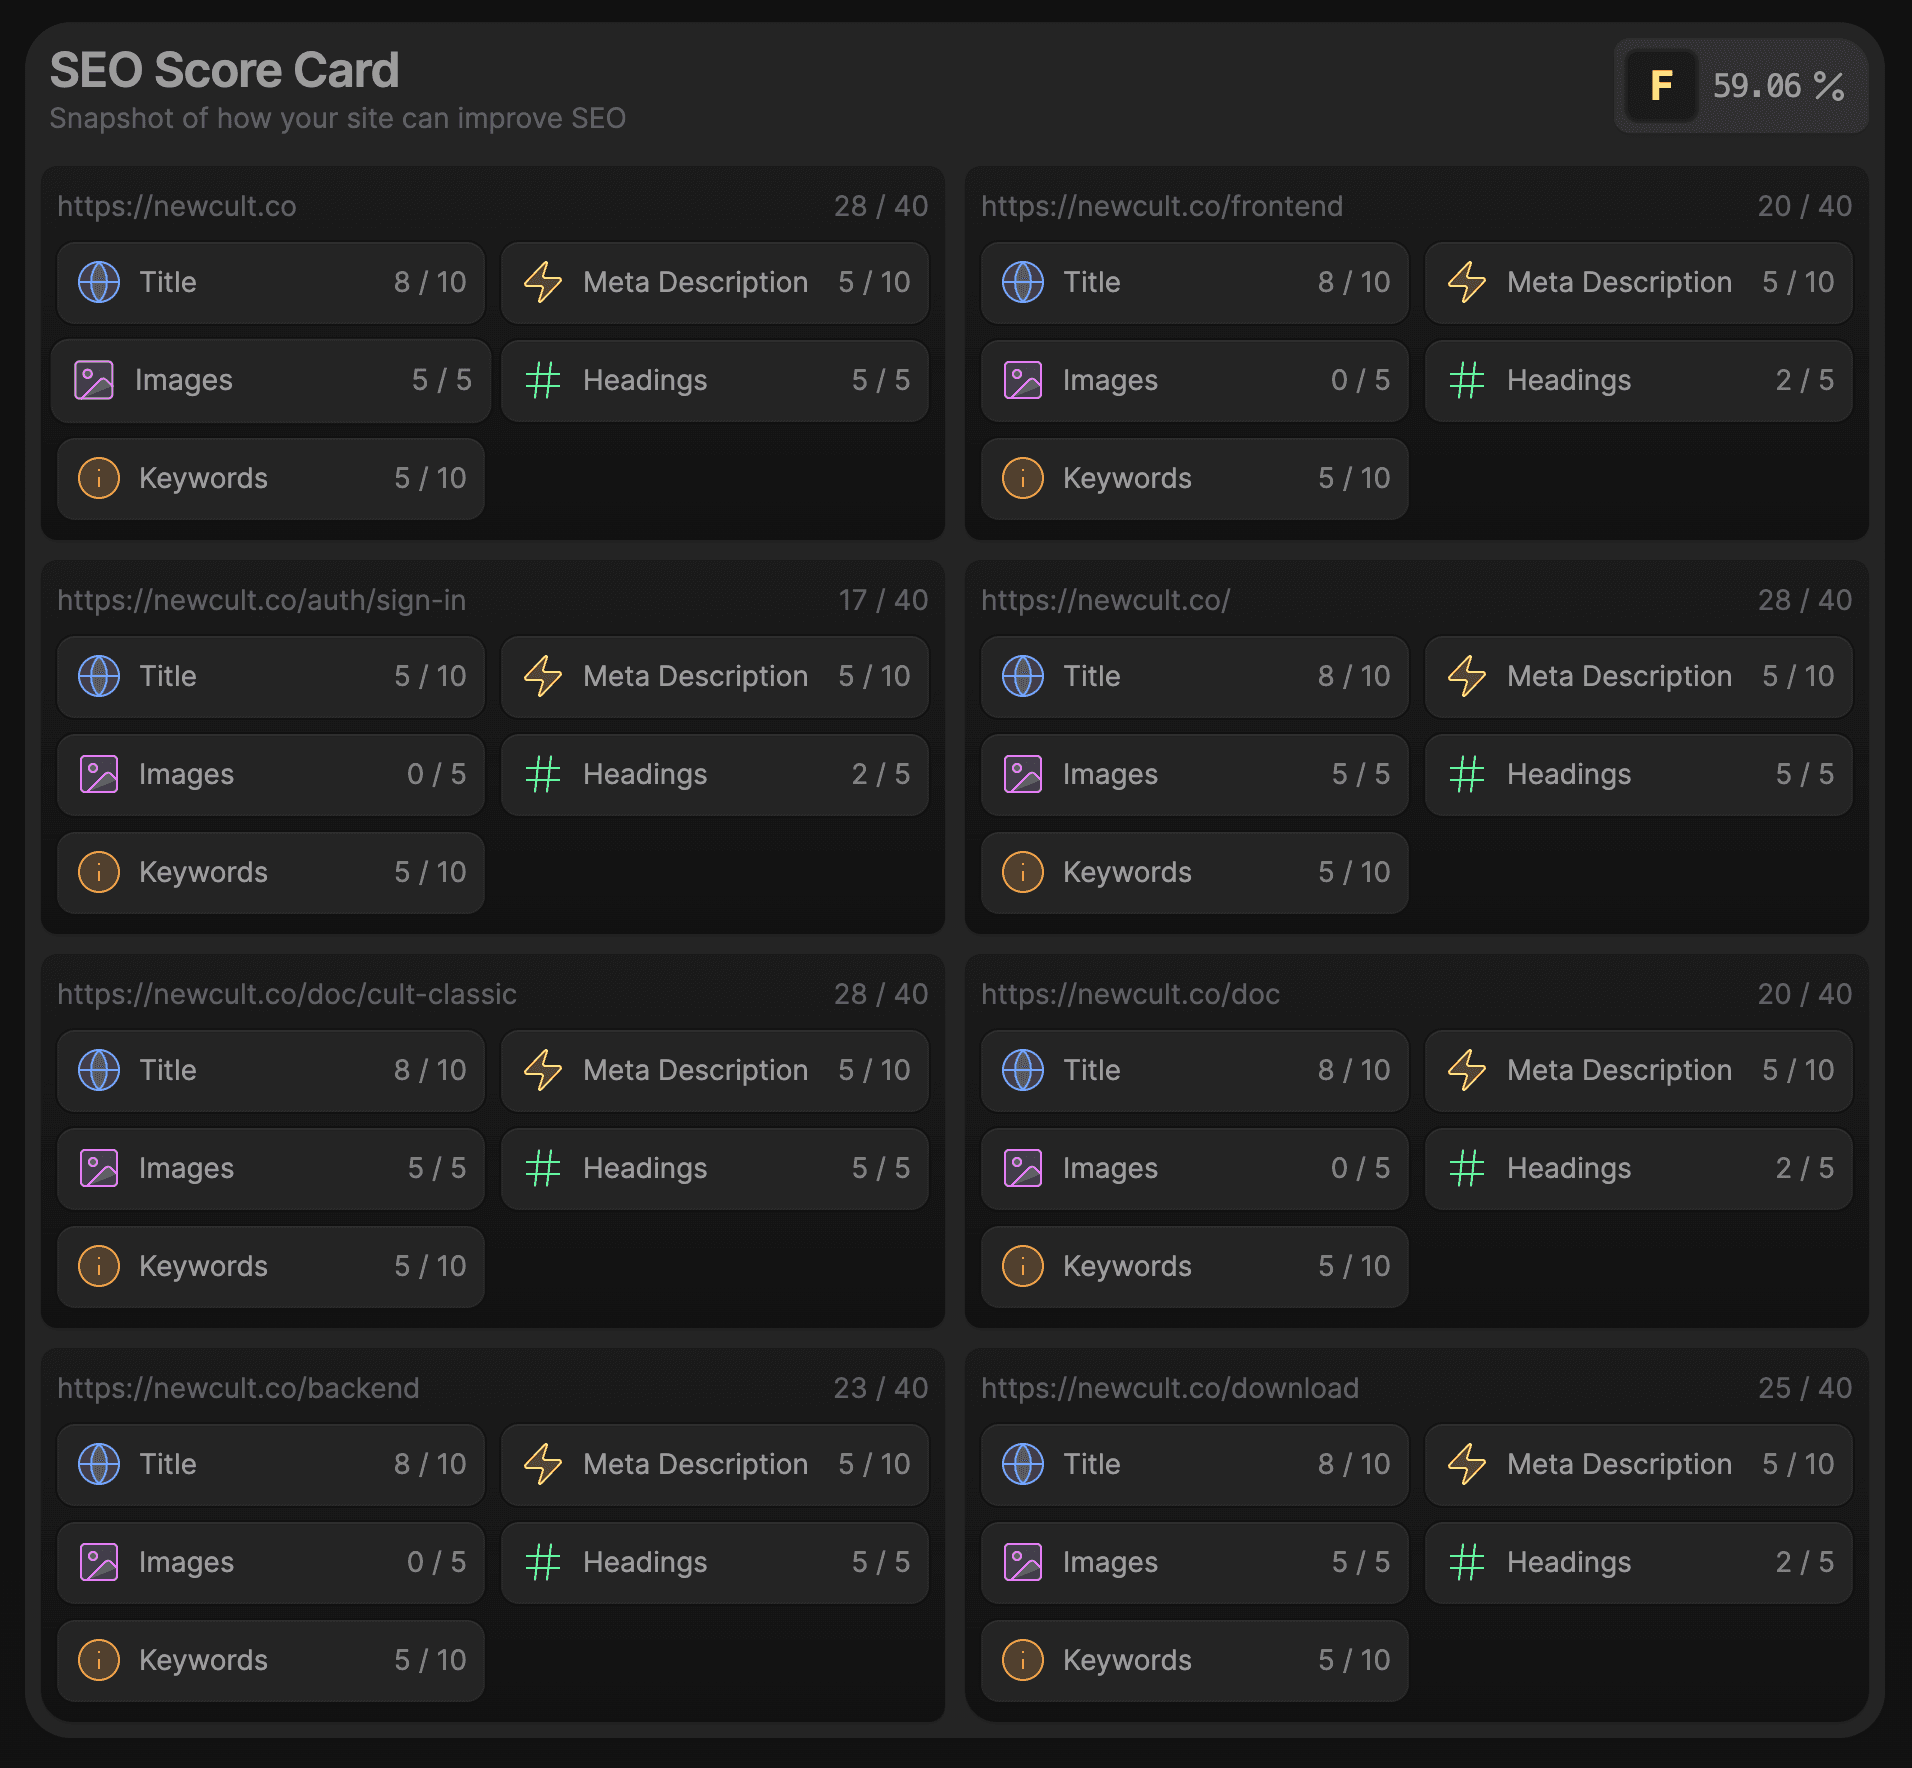
App Screenshots