Prompt Stash
A local-first AI prompt manager with variable highlighting, secure key storage, and AI agents. Organize and optimize your prompts offline.
Advanced Prompt Editor
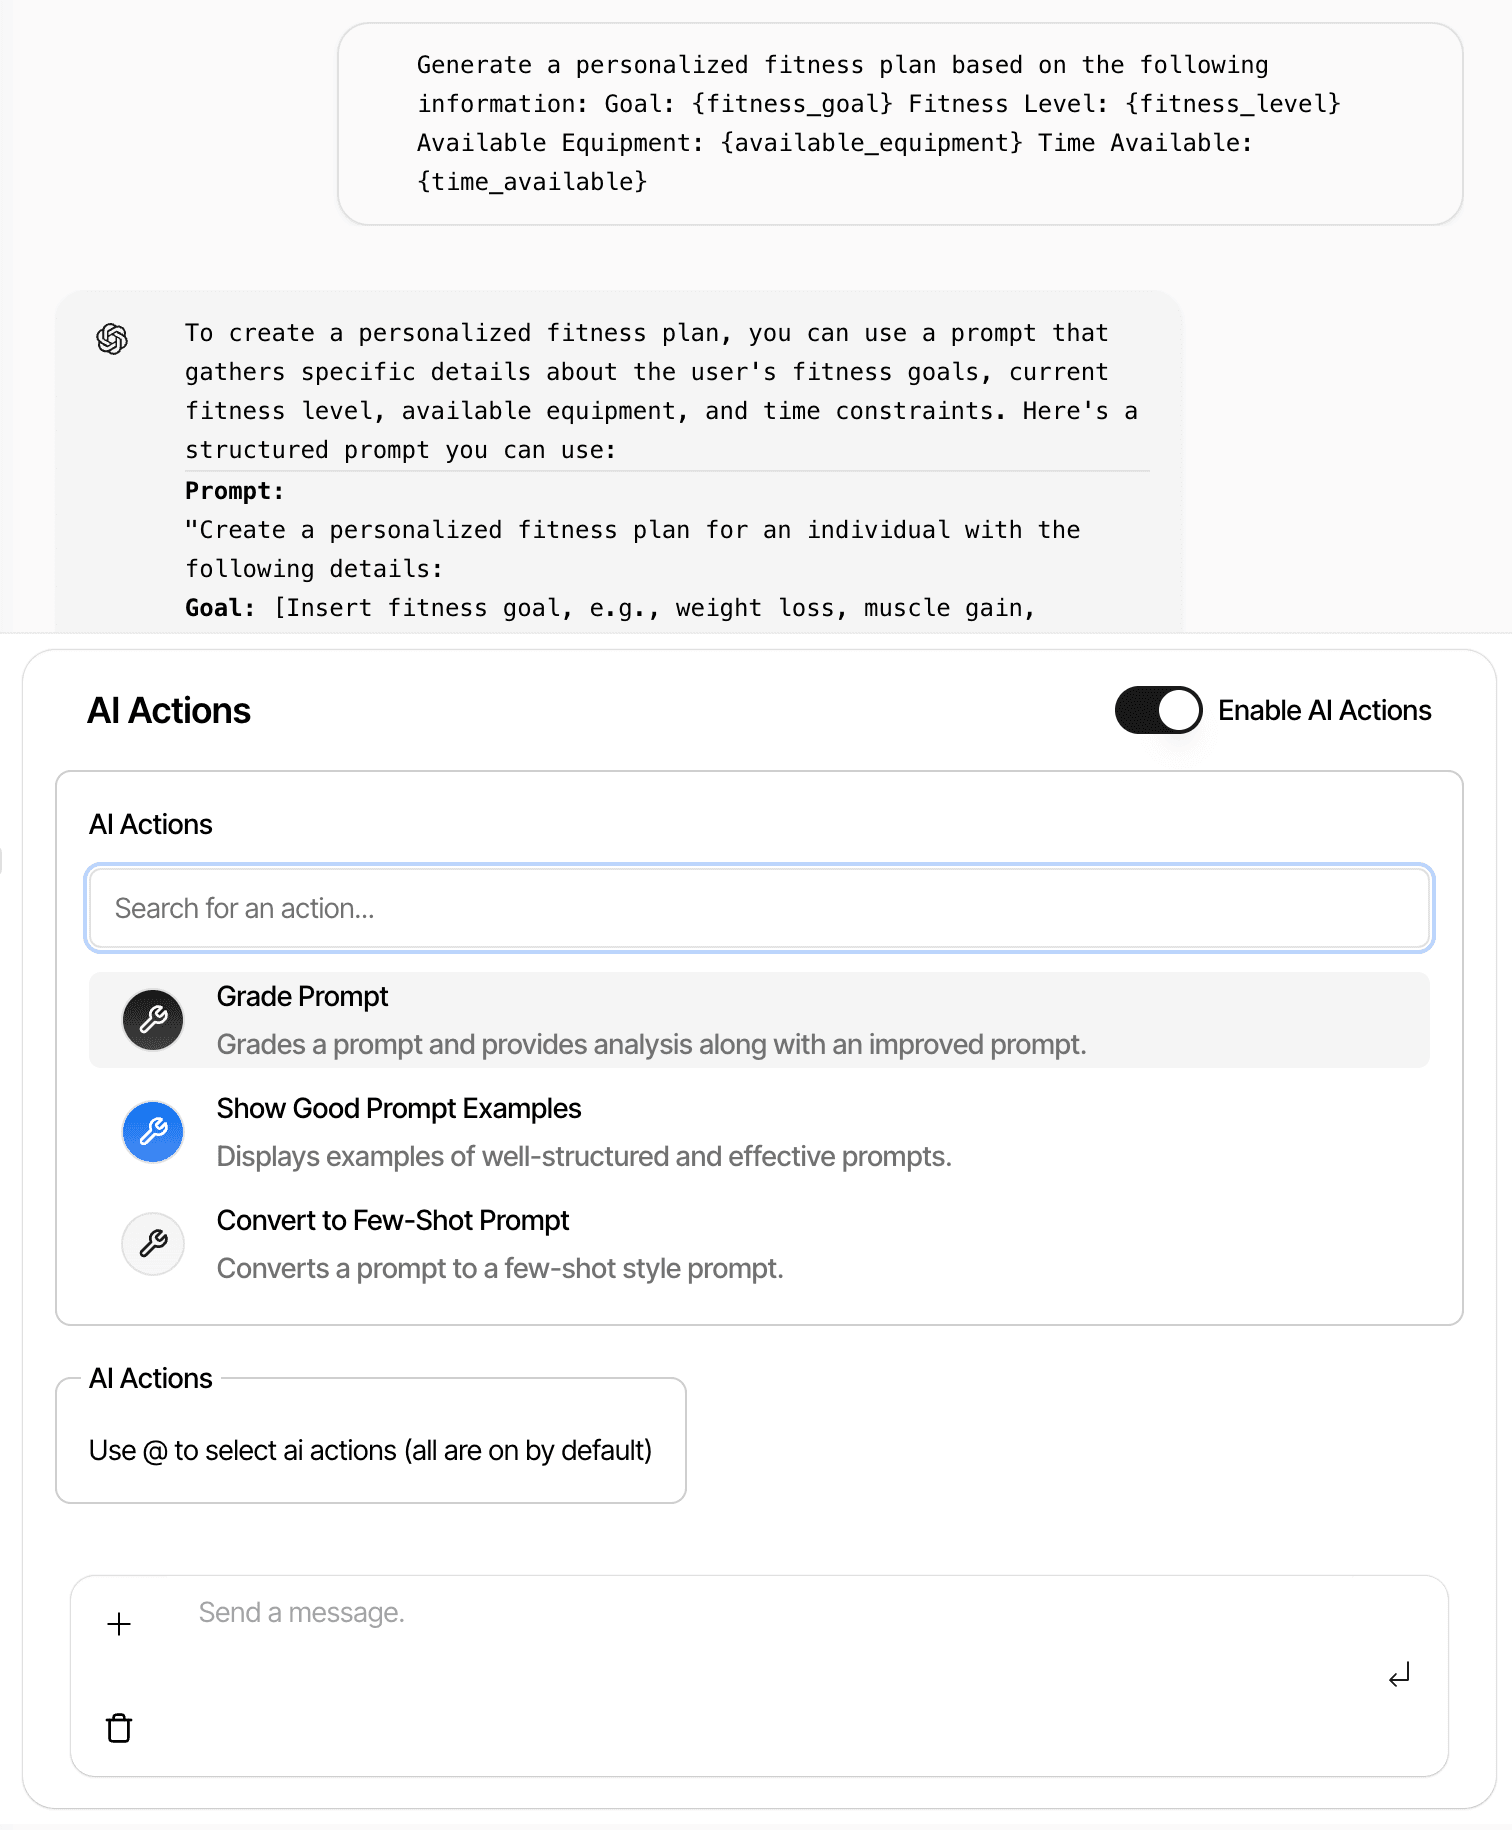
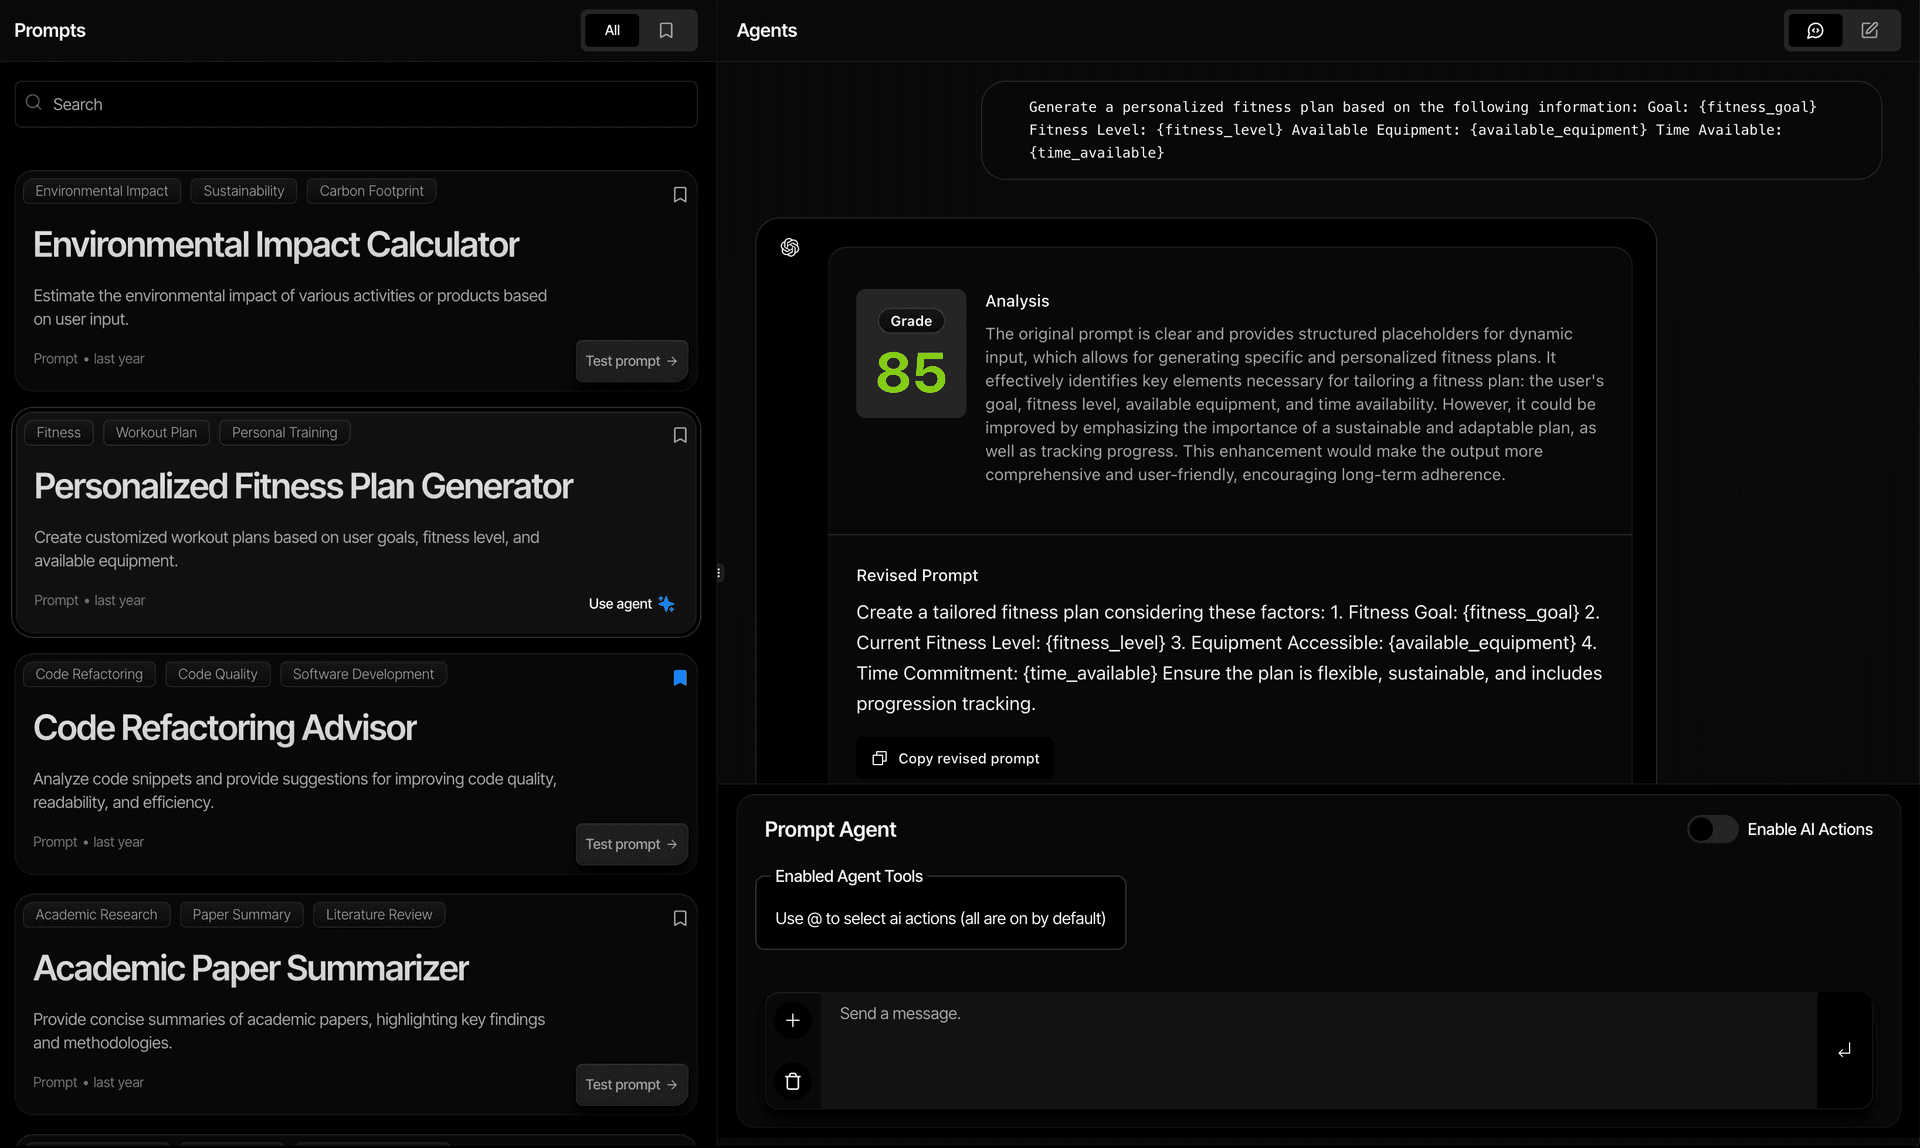
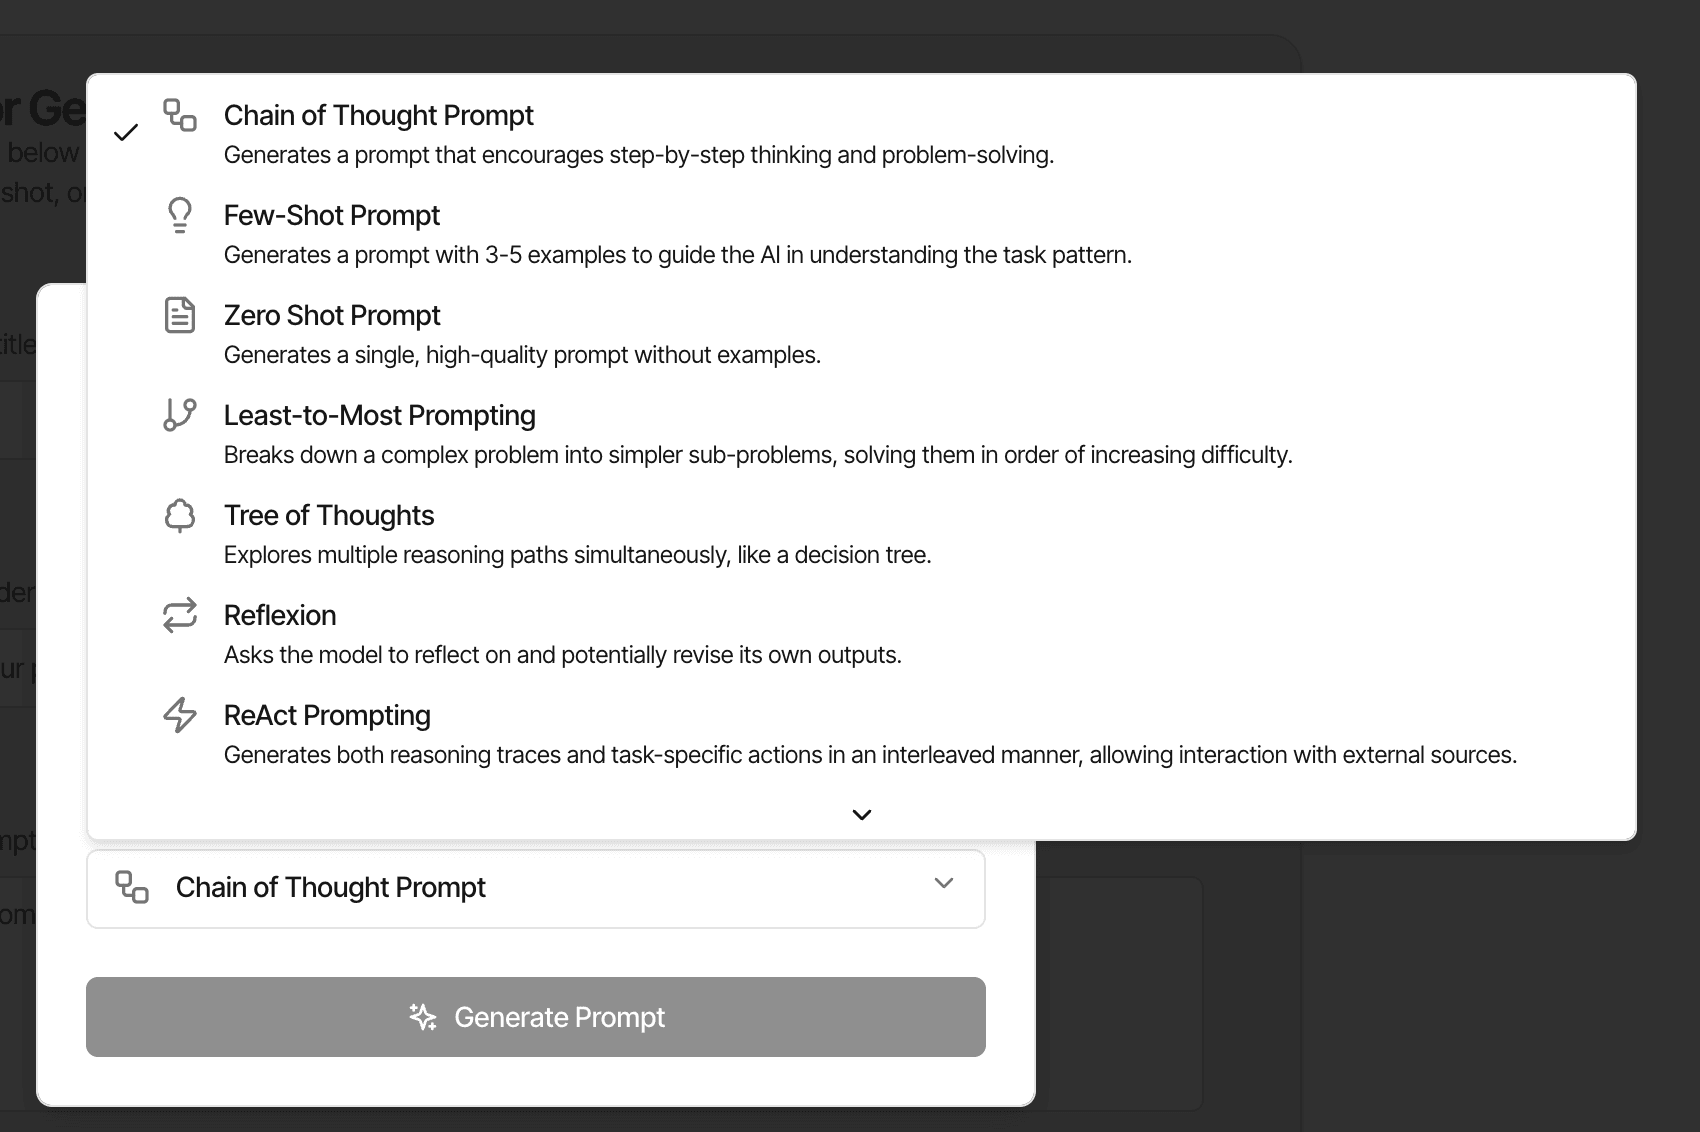
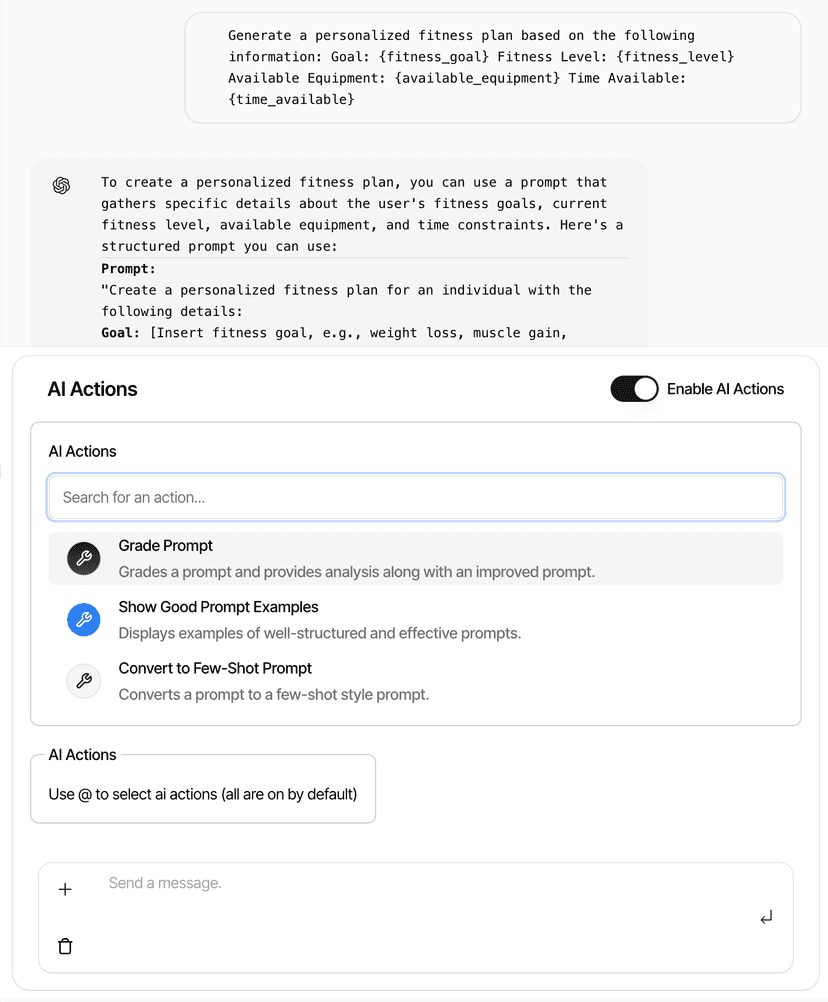
AI Agent System
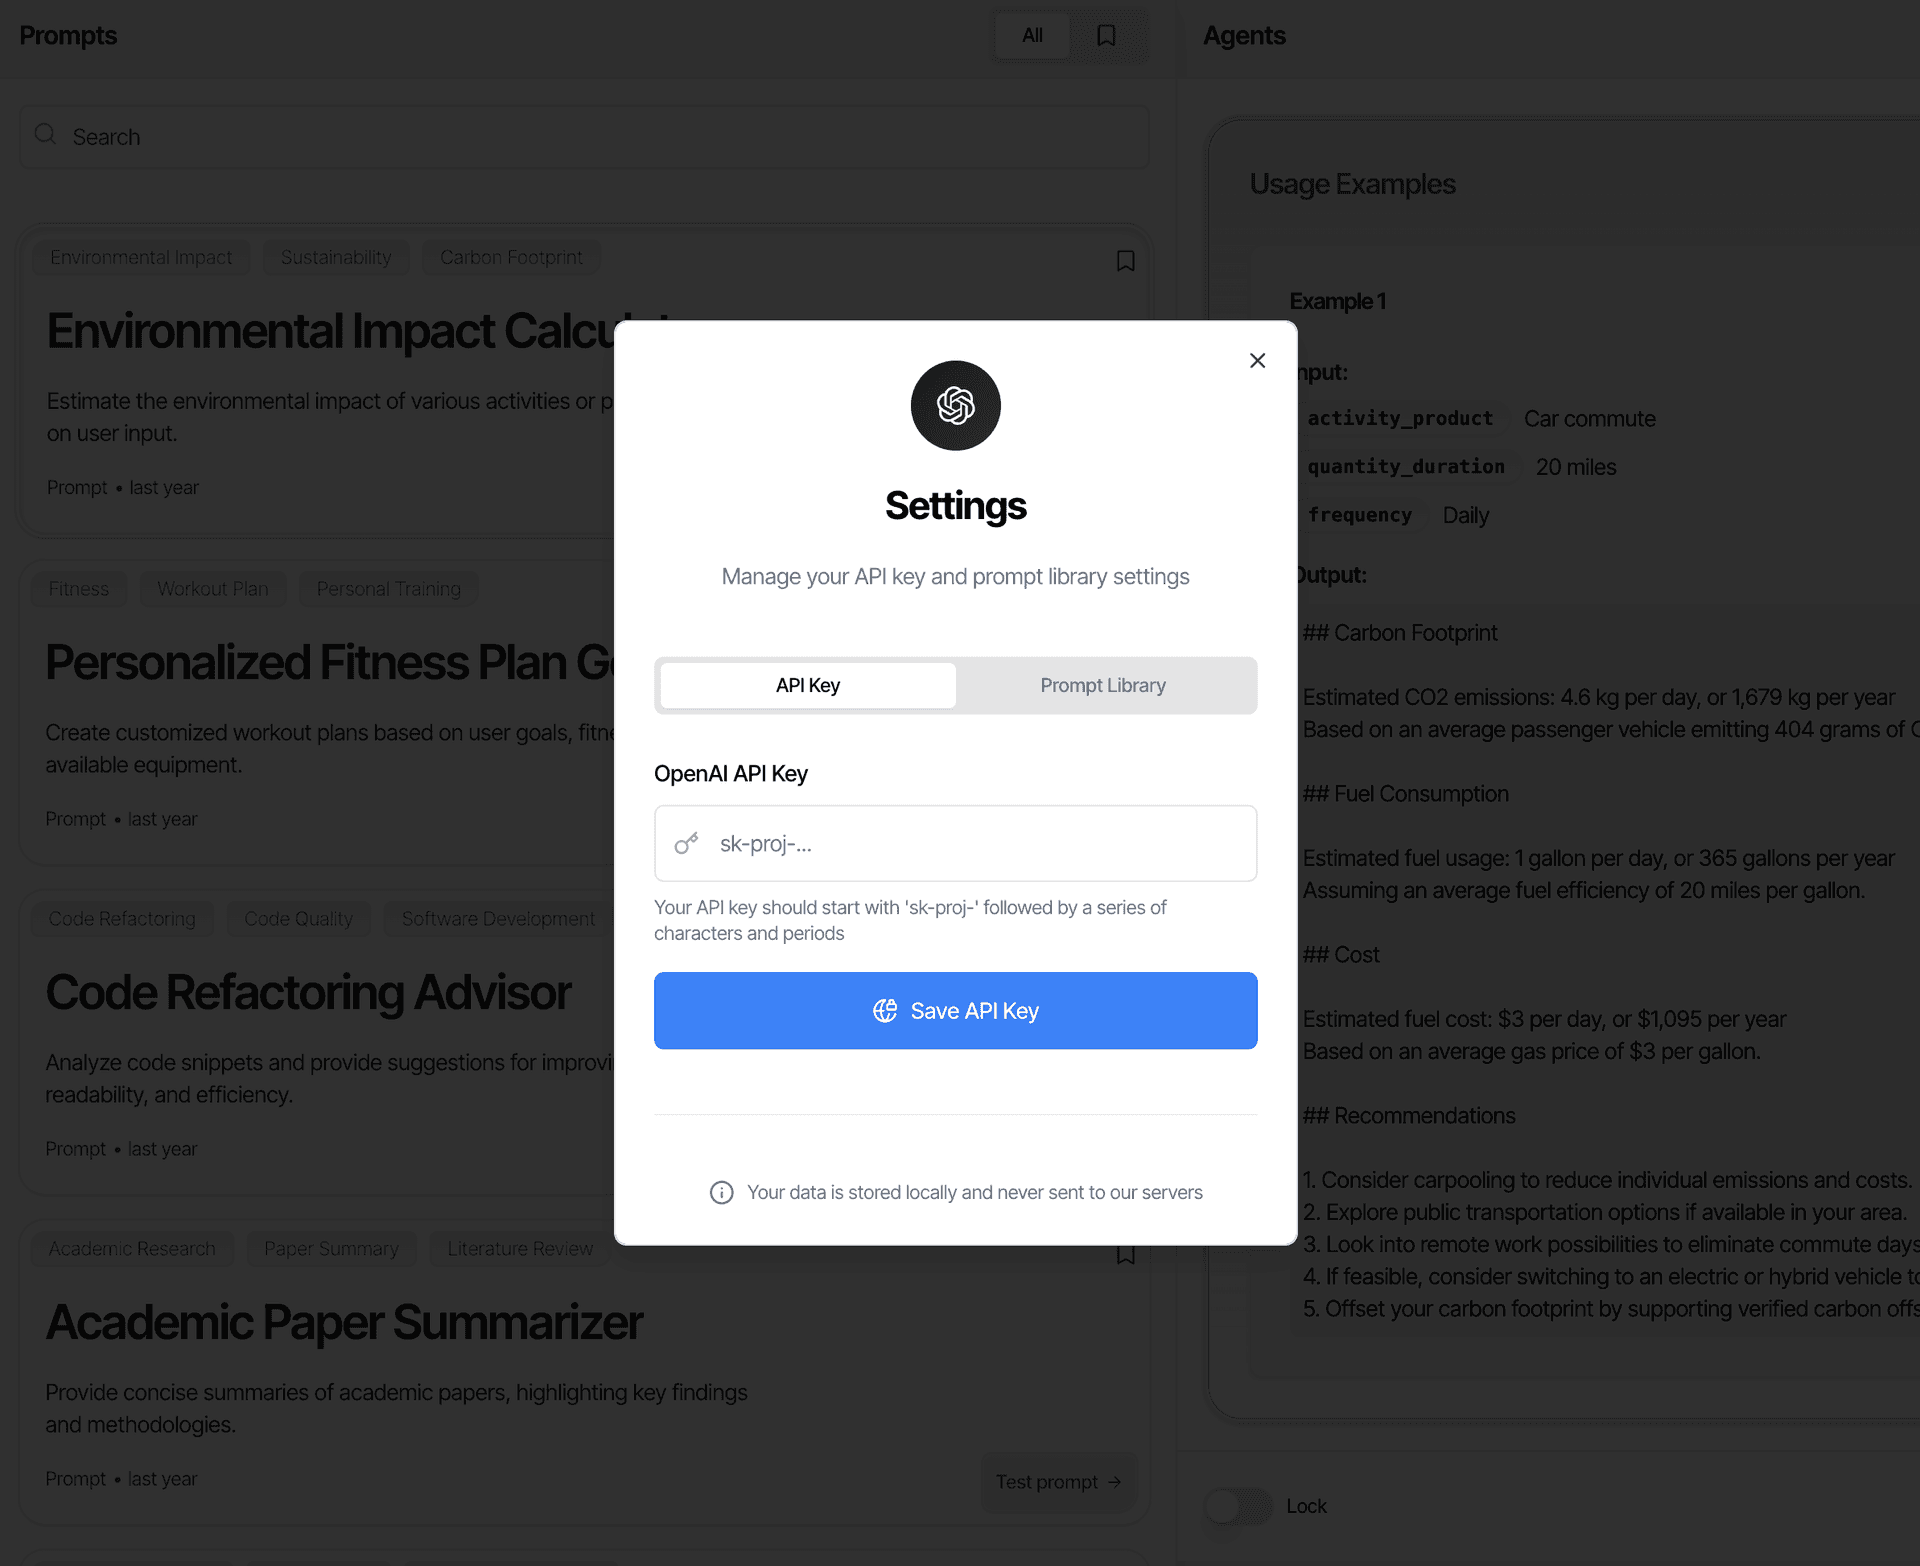
Secure Key Management
Local First State Management
Next.js
Tailwind CSS
Open AI
Key Features
Advanced Prompt Editor
Interactive prompt template editor with variable highlighting and real-time preview capabilities.
AI Agent System
Extensible AI agent system with custom tools for prompt optimization, grading, and few-shot learning.
Secure Key Management
AES encryption for API key storage with secure persistence between sessions.
Local First State Management
Robust state management using Jotai for efficient prompt organization and filtering.
App Screenshots